
First Look at Adobe’s New Video Editing Software: PROJECT RUSH
This week Adobe announced the release of a private beta of Project Rush. It’s a new all-in-one video editing app that can be used in both desktop setups and on mobile iOS devices. This new creative cloud app is designed to make it easy for people to make quick video for social media. Rush is not replacing Adobe Premiere Pro, it's actually doing the opposite -- it’s targeting its own set of social users. You can apply to test Rush here.
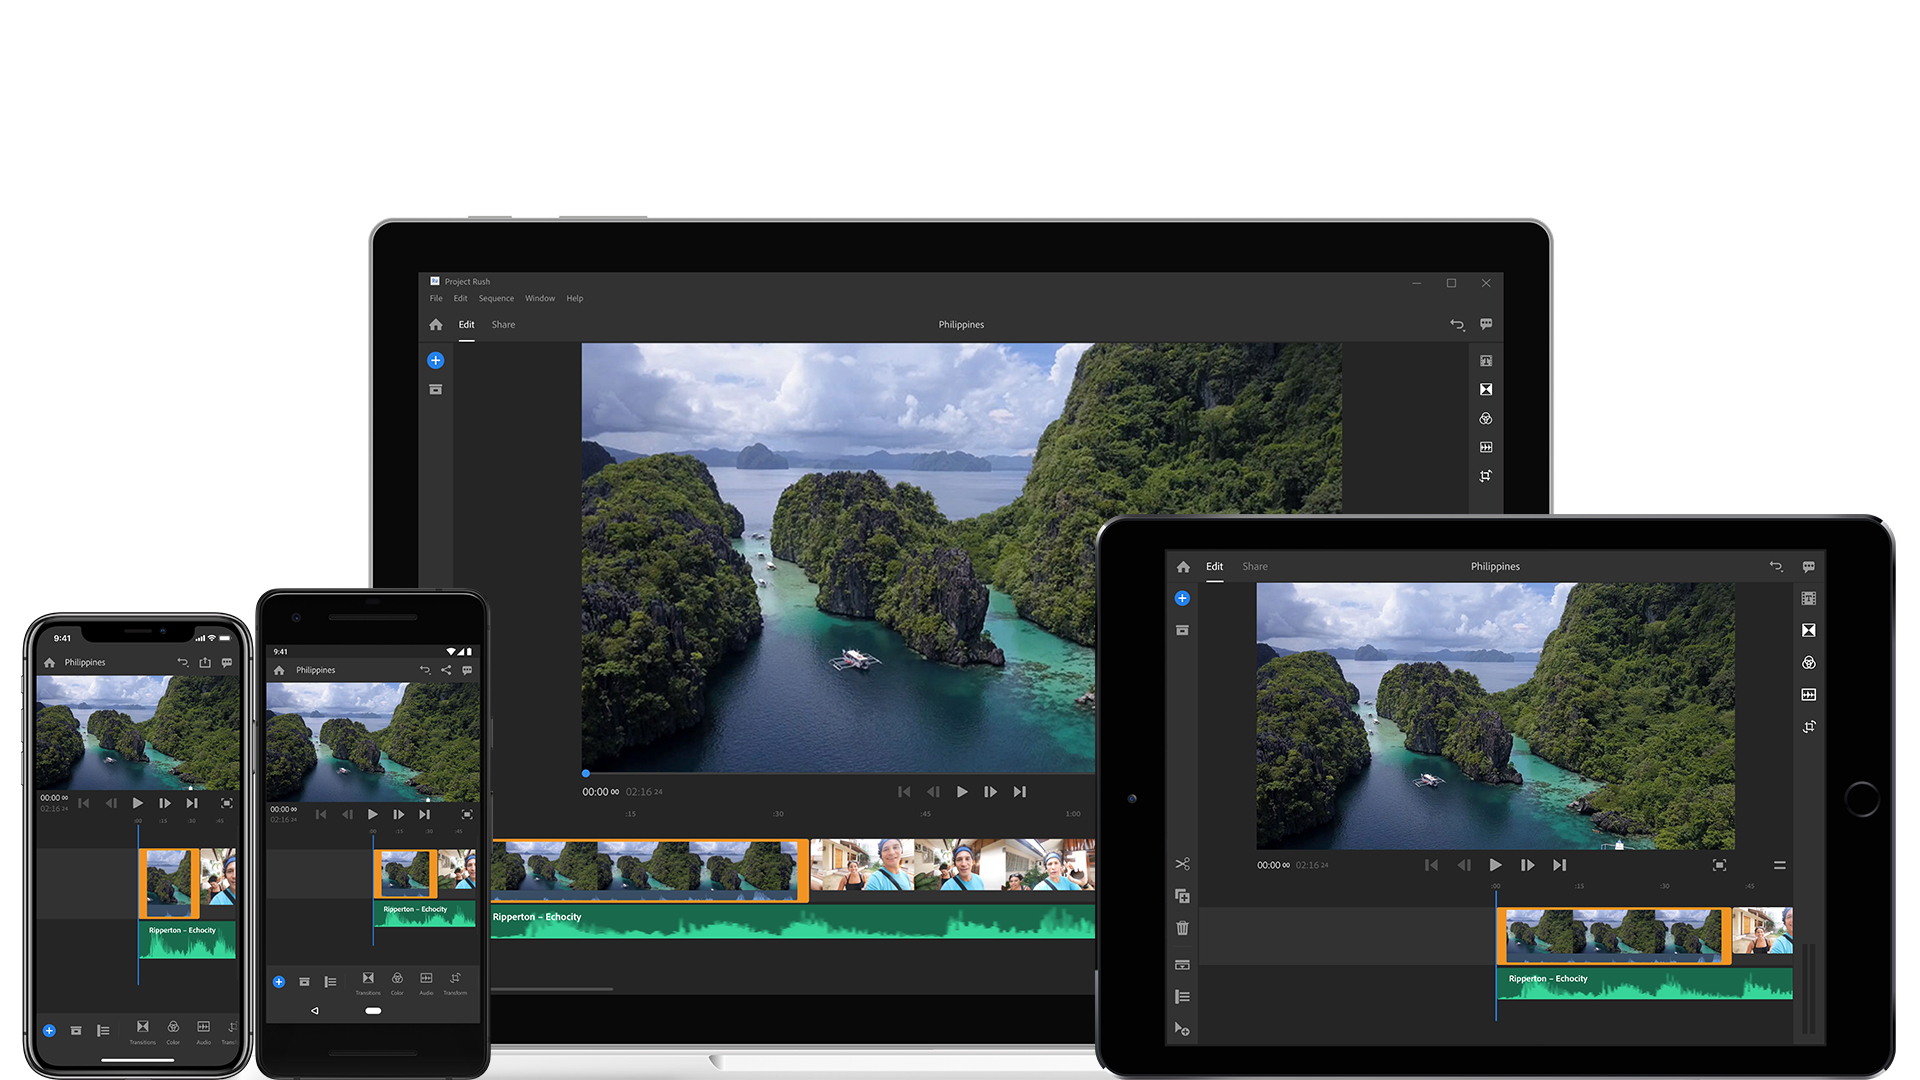
Project Rush can be used seamlessly across devices through Adobe Creative Cloud.
Rush's target audience is for social media managers or marketers who have no experience with video editing and want a quick tool that will allow them to make fast videos for social media.
Over the past year I created motion graphics templates for the Rush team which helped them test and built out the software. I'm excited to see how far it has come and now you can apply to the beta try it out yourself for free! So now let’s go through some of RUSH’s video editing features and some things that could use improvement.
Before we jump in, huge shout out to SoundStripe for sponsoring this blog post. It offers unlimited, affordable and no legal mumbo jumbo music for filmmakers and for people making videos for social media. For just $15 per month you can get unlimited music for any type of video. And you can get 10% off with my code GAL10.

Streamlined Media Management

Tap to move the yellow selection area to select your media.
PROS
- Easy Navigation: Rush gives you a clear picture of what media is on your computer so you can easily locate and import the video, photos or music you need to create your first video project
- In and Outs: If you click on the full mode of the video you can select the portion of the video you want to add to your timeline. This is similar to selecting in and out points in Adobe Premiere Pro and creating a timeline of your “select.” Then hit the “+” button to add it to your project and to start the project
- Project Panel: Once you create the project with your selected media assets, you can always add in more media. You can find a project panel by clicking on the project box icon on the left-hand menu, and you can always add more media by clicking on the plus button to add more media
Auto-Proxies and Auto-Saving to Cloud
When you start a project, there are two boxes which allow you to "Sync with Creative Cloud" and "Copy Media." If you check both, your proxies of your video will be saved to your creative cloud in a folder called “Adobe" and a copy of the media will also be saved to your Rush imported media folder. To change this local media folder, just go to Project Rush > Preferences. Here you can change the media import folder destination.
Once inside of your project, if you press the home button, it will take you back to your home page this is where you can find all your current Rush projects. It is designed this way so you don’t need to go to the cloud files or a specific folder to open a project. Just simply launch Rush and click on your existing project to continue editing.
CON
- There is no clear way to re-name your project or change the cloud settings after the project is created. This is something that I hope will be improved in the next build of Rush
A Simpified Timeline
Your timeline in Rush is automatically created based on the size and frame rate of your media. There is no need to setup a sequence to edit from, Rush handles that for you. There are both pro and cons to working with the new simplified Rush timeline. Let's review them below.
PROS
Simple Montages: It’s really easy to put together a quick montage. You can simply move your Current Time Indicator (CTI aka the playhead) and then hit split and it will cut at the CTI. Then you can delete the section you don’t want and Rush will automatically roll the edit together. There is no need to delete the empty space between the clips. Another way to edit is to a roll back a clip to meet your CTI in the timeline.
Track Expansion: You can expand the track controls which will allow you to turn the layer on or off, mute the audio or lock it in place. Also, when you click on a clip you can expand it to see the audio layers in a bigger view
Playback quality: In Premiere Pro, you can change from full, 1/2, to 1/4 resolution for playback and in Rush you can change from a high, medium or low playback quality. If you set it to low, you will have a faster playback.
CONS
Track limits: And you can only have up to three audio and three video tracks. This is a decent amount of tracks for Rush's social media user: two layers for video and one layer for text will do.
Audio and Video Linking: A video clip's audio is linked to the video as one layer, the audio is not on its own separate layer like a music track in your timeline timeline. This design makes it difficult for users to de-link the audio from the video and delete the audio from the clip without deleting the whole clip. You can, however, roll the audio back separately from the video to create sound bridges.
Recording Voiceover
When you go to add more media to your project you have the option to also record a custom voiceover. I was surprised by this feature as it allows you to connect your own mic and record. Just go up to preferences and make sure you have the microphone you want to use for your audio input. Then you can choose which audio track you want to record to and when a track is selected red that means it is the track you are recording to. Then just hit record and you can begin recording.
CON
- Unlike Premiere Pro, Rush does not have a track mixer for you to monitor audio levels during the recording.
Basic Transitions
PRO
If you want to transition between clips, such as a fade, there are only three transitions to choose from: Cross dissolve, dip to black, and dip to white. But these are the basic transitions you need to make a basic edit, so it works for the target social user.
CON
It is not clear that the cross dissolve is also meant to be used on both video and audio. You can actually use the cross dissolve transitions to fade music out by dragging it on the end of an audio clip. You can also change the duration of the transition from the edit tab, but the slider only moves to 3 seconds. You need to go to the timeline and manually drag the transition to extend it further.
Motion Graphics Templates
The text panel in Rush looks very similar to Premiere Pro's Essential Graphics Panel. Within the Text panel you can browse existing motion graphics templates (.mogrts) in your local templates folder or you can purchase .mogrts from Adobe Stock by searching for templates you need (which you can keep and use forever).
If you purchase templates from other stock sites, like Envato Market or Motion Array, you can use the “...” button to import motion graphics templates which you can customize in your timeline.

Explore Motion Graphics Templates from Envato Market.
PRO
DIY: You can create your own title from scratch and save it as a motion graphics template
AE & PPRO MOGRT Compatibility: You can edit and use motion graphics templates designed in both Premiere Pro and After Effects
Color Adjustments
Rush also comes with built in color presets which behave similar to instagram filters, they are designed so you can quickly choose a color to add to your video.
PRO
You can easily apply filters to a selected video clip
There are are also advanced settings if you want to adjust the exposure, vibrancy, blacks, whites, highlights, shadows and more

Color presets to choose from in Rush.
CON
You cannot lasso and select all clips in the timeline and apply one filter to them
There is no way to copy and paste color attributes from one clip to another
There is no adjustment layer option to apply effects to one layer on top of all video or photos in the timeline
Transform
In Premiere Pro CC there is an “Effect Controls” panel where you can transform the scale, position rotation and opacity of your clip. Rush also has this but it is called the transform panel and it's located in the right-side menu of the program.
PRO
Motion Tools: There is basic horizontal and vertical controls, rotation and scale controls
Copy & Feathering: There is also an advanced section where you can crop the video and change the opacity and edge feathering
CON
Single Clips Only: You cannot select multiple clips at a time and apply the same transform tools to multiple clips at a time
No Keyframes: You cannot keyframe the transform controls to change over time.
Seamless Vertical, Landscape and Square Timelines
One aspect of Rush that sets it a part from it's professional counterparts is that you can simply click a button to change the aspect ratio of the timeline, it comes with the three top social orientations: portrait (vertical), landscape (16:9), and square (1:1).
PRO
You can seamlessly change between landscape, portrait and square formats during a video edit.
CON
When you change to portrait mode it does not auto-scale the clips, you have to manually go in and scale the clips with the transform tools to fill entire vertical portrait orientation. This can take a lot of time.
Sharing
You can export your video so it is optimized for social media. There are many presets for Twitter, YouTube, Video, Facebook and more to choose from.

Login to your YouTube channel and prep your video for publishing upon export.
PRO
You have the option to save your video export to a local drive
You can also login to directly share it to YouTube, Facebook, Instagram, Twitter and more. You can choose your channel, title, description, privacy, tags, thumbnail and much more
Open Rush Projects in Premiere Pro CC
One other great thing about RUSH is that you can start a project there and if you need to add more complexity, you can open the project in Premiere Pro. But once you open in Premiere Pro, there is no going back to RUSH.

Concluding Thoughts
Overall, Rush is not a software for professional TV and weekly vloggers. It is designed for people who want to put together a few video shots overlay some text and then export. It's a great software for people who want to make shorter form content from existing longer form.
And the good news: RUSH enables users to do exactly this.
My suggested requests to make the experience even better are:
Better audio and video track separation flexibility
Inclusion of adjustment layer(s)
Selecting and applying color and transform effects to multiple clips
Copy and pasting effects
Let me know what you think about RUSH and if you think it would fit your video editing needs in a comment below.
RUSH FAQ:
Will Rush be available as an app in the Creative Cloud? Yes
When will Rush be available to the public? Most likely fall 2018.
Will Rush be on a different pricing model than existing pro apps? Yes, the pricing will not be released until Adobe MAX in October 2018.
Will Rush replace Premiere Pro CC? No, the software is for video amateurs and for social media managers who need to push out quick and simply content to multiple platforms.