
3 Simple Steps for Better Skin Tones
In today’s blog, we’re going over some steps for making your skin tones consistent, that way you or people in your video don’t look too orange, yellow, or pink. Having a correct skin tone really makes a difference when it comes to making your video look more professional. The 3 steps we’re looking at today are White Balancing, Picture Profiles, and Lumetri Scopes in Premiere Pro.
White Balance
To give a better understanding, we’re going to go over white balance using the Canon EOS R as our example camera. You will want to set the camera to photo mode and take a photo of the scene with a person in frame holding up a white card. If you’re working by yourself, you can get a remote to take that photo. Although auto white balance is always an option, it doesn’t achieve the best white balance as the custom white balance when holding a card. I think we’d all agree that when we’re able to customize our settings, we are much happier with the end result.

Picture Profile Settings
Most cameras have different picture style settings you can choose from. That being said, it is not recommended to choose one of the special picture styles because they will change your picture color and color temperatures, making it difficult to correct skin tones in Post.
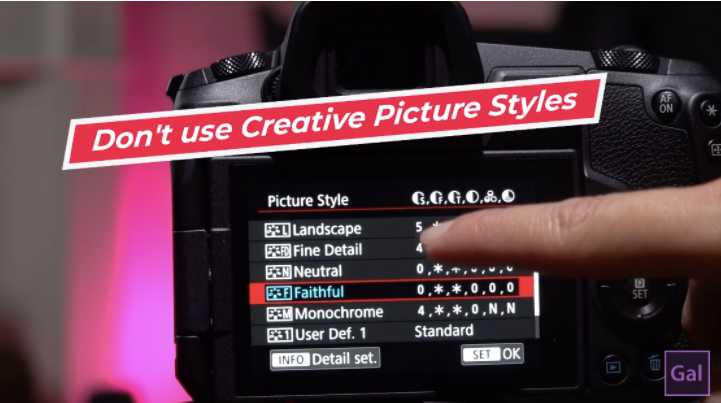
If you want more flexibility and dynamic range to work with, try shooting in a log picture style format. Using the Canon EOS R as an example camera, you can go into your menu and choose Canon Log. If you’re new to log, you’ll see that out of the camera it will look more washed out and gray, but you can color grade it to look great. Although there’s a bit more work involved in grading, the end result is totally worth it. For non-log users, you can definitely shoot in standard HD and still achieve great skin tones, especially on Canon which has great color science.
Lumetri Skin Tone Corrections
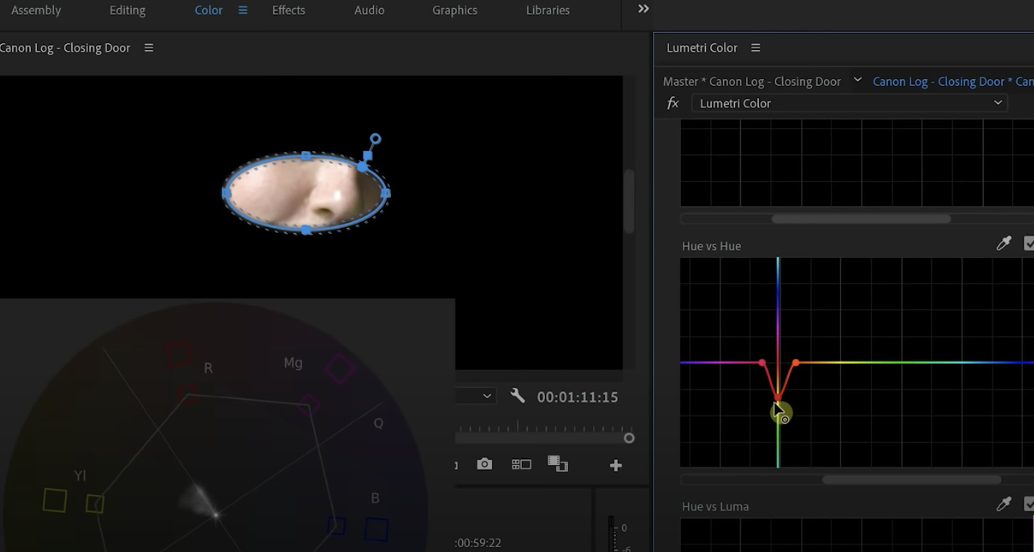
While the human eye is pretty good at detecting if something looks off, the most scientifically correct method would be to utilize the Vectorscope within Lumetri Scopes when you’re in Premiere Pro. As you pull up the Vectorscope in Lumetri scopes, it will map out all of the color for the video and display it within the vectorscope.
Say you want to isolate the color to check your skin tones. You can draw a mask around a particular area on your video scene to isolate the color for that particular area. At this point, you would review the vectorscope to see if the color is lined up with the skin tone line. You definitely want the color to be directly on this line or as lined up as possible. If it’s more in the yellow or the red, you can then use the hue saturation curves or the fast color corrector to make adjustments.
If you’re looking for tips on how to correct skin tones in Final Cut Pro, check out Caleb’s Video at DSLR Video Shooter where he uses hue saturation curves in FCPX.
Final Thoughts
As you’ve probably heard before, “Good audio makes good video! The same can be said about good color and skin tones! In your work, you’ll find that when you’re working with proper balance and utilizing all the wonderful tools out there such as vectorscopes and even waveforms, your work gets better and you find that you can achieve the professional quality you’re looking for. Like technology, there are advancements in color science and tools that we use every day to achieve high quality work. If we keep sharpening our skills and using tools such as the 3 steps mentioned here today; we are in for a very colorful road ahead. Until next time, stay safe & stay creative!