
3D Animate Your Photo in Adobe After Effects
You may have seen Facebook 3D photos, but how do you make them on older photos? In this tutorial, you will learn how to modify a 3D face depth map template in Adobe After Effects using mask adjustments. I will cover two different face depth maps, the half left profile map and the front face map. You will also learn how to draw your own background masks. After the depth map is created I will show you how to enable relighting of your face and animate the camera layer to produce a 3D effect. Below you can watch the tutorial or follow the written step by steps below.
Step by Step
Step 1
Download the 3D Photo Template from Envato Elements. After you open up the template, place the portrait image you are using into the first composition

Step 2
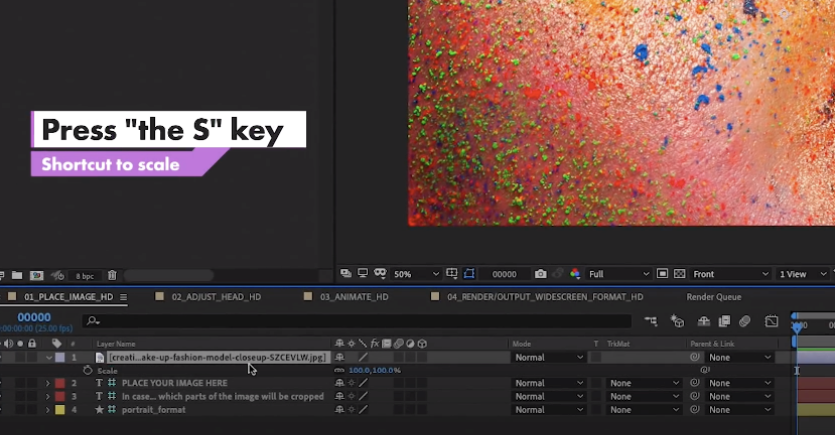
Scale down image if necessary by hitting "S" shortcut key. Click blue percentage value to the right of "Scale" and drag to the left to scale it down. You can also then click and drag the image to reposition image on screen.
Step 3
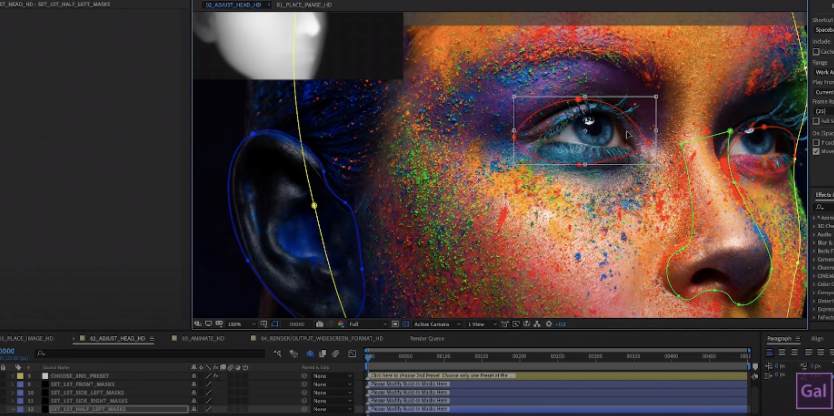
Click on the Second Composition “Adjust Head Composition” to build the depth map. Select "Fit" to fit the composition to the window and you will now see the preset. We will be changing the preset to left half preset. To do this you will select the layer, choose 1st_Preset, then go to Effect Controls and uncheck Preset Use Front, then check box for Preset Use Half Left.
At bottom of the screen, click Set First Half Left Masks and you will see the masks appear. We will now reposition the masks to fit the face. Begin by clicking drop down to the left of "Set 1st Half Left Masks" layer and toggle down to Masks. Click on the first mask, hold shift and click on the last mask so all of them become highlighted. Next use keys Command + T ( for Mac) or Control + T ( for PC) to select all masks. Then you will want to scale down comp to 33% to have a better overview. Next hit shift and click on the lower left corner of the image; scale up the size of masks to make the masks fit the face. Once it's almost there, you can go back to "Fit" and select fit to get your original view back.
At this point you can access each individual mask and refine to fit around each feature. Click on the "Set 1st Half Left Mask" layer, then double click on the desired mask and adjust according by points or handle to adjust curves. If desired, you can hit Command and Plus key (Mac) / Control +Plus key (PC) to zoom in. You can then use the H key to enable the hand tool to move the mask into place. Use the V key to access the pen tool and then toggle back and forth with the H key to move around as needed.
Step 4
We will now build masks for other areas such as the hair and neck area by clicking on a layer called "Set Back Objects Masks". You will see on the right that there is an option to select for building your own mask. Use the G shortcut key to access the pen tool and build your mask.

Step 5
In this project, we will need to get rid of the depth viewer to allow for masking around the hair. We can remove the depth viewer by selecting Control Depth Map Layer, then deselecting the box for Show Depth Map Preview above in effects controls. Now you're free to create your next mask by revisiting Set Backs Objects Mask down below, similar to before.

Step 6
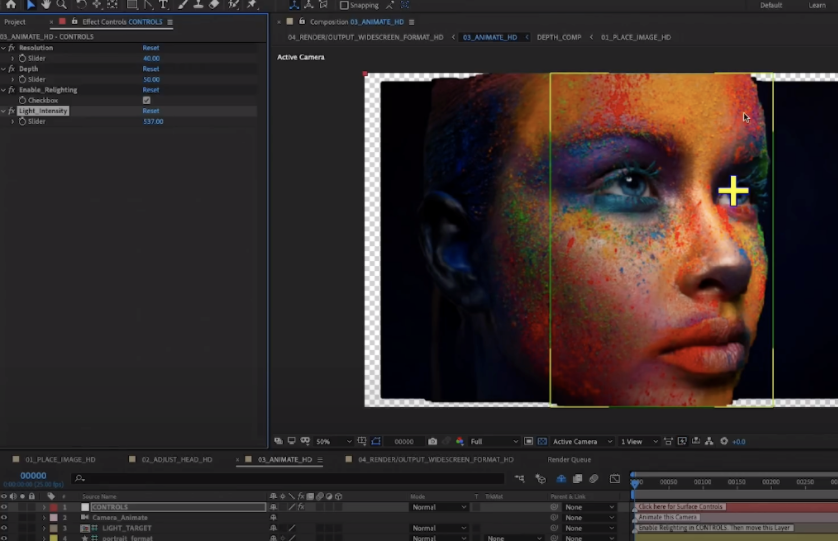
Now we're ready to animate! Select Animate Composition (the 3rd composition) First thing to do here is select Controls and then enable relighting; this will put on new light where we can adjust intensity. Drag the cross to where you want the light to intensify; this will make the animation more interesting. We will then increase light intensity by selecting controls, then light intensity and dragging the percentage to the right in order to increase intensity.
Step 7
Next we will get the black background to fill up the screen and cover up the transparent background. We will press "C" to access XY Camera Tool, this can move the camera left to right. Pressing "C" again will bring up the Z camera tool to help move up or down. Click and push up to zoom in. Press "C" again for the Camera Orbit tool. Click and move to see the face rotate. If you see distortion, you can change the resolution on the slider to 300.

Step 8
We will now enable key framing by going to Transform under the Camera Animate layer. Click the clock icon next to Point of Interest and also the one next to Position; now we have 2 key frames.

To make the animation 5 seconds, we will multiply 25 x 5 and input 125 into the frames area as seen here:

Step 9
Next we will change the controls of the camera. We will click on the image and drag to the right slightly to get some more rotation. Then hit " C" key to access the zoom out tool, click and drag down to get zoomed out view that you desire.

Step 10
Next go to Fourth Composition to render out. Select Fit to get the image to fit to screen. Adjust the work area to shorten to only area that will be rendered.

Step 11
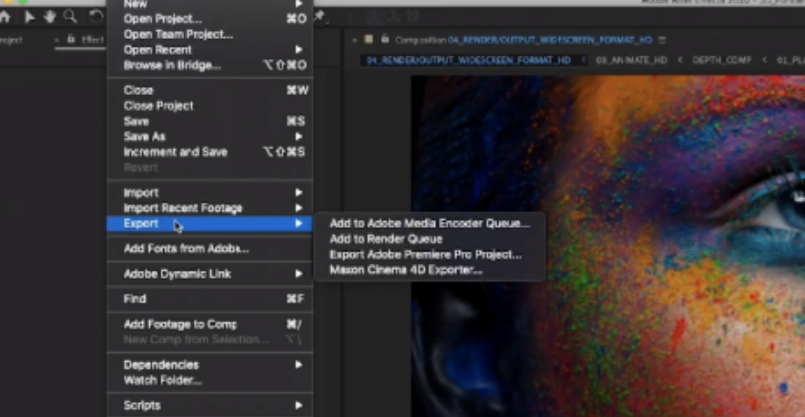
After reviewing your rendered work, you can Export by going to File > Export and select Add to Encoder or Add to render queue.
And that’s it! If you’re interested in more templates like this, Envato Elements has heaps of other templates to help your creation needs, such as Auto-Resizing Titles, Logo Openers, Graphic Product Mockups, Music, and SFX. The best part is, it’s a small monthly fee and you can access unlimited downloads. You can get 70% off your first month with Gal’s affiliate link here.