Automatically Organize Premiere Pro Project Files with MazeMapping
Organizing and importing files in Premiere Pro can become laborious and cumbersome. This is why Ezra Meijer developed MazeMapping, an assistant editor that organizes Premiere Pro files in your Project panel so you can get onto the creative part of editing faster.
MazeMapping is unique because it will automatically place certain file types in to specific bins you indicate. For example, all the .wav files that start with the name “ES” will be put into the “SFX” folder or all the .png files will be automatically put into the “STILLS” folder. MazeMapping is available for both Mac and PC users and you can try it out free first with a free 4-day trial. The MazeMapping team setup a discount code so you can get 10% off just type in GAL10 at checkout.
So how exactly does it work? This blog post will provide all the answers.
Note: This blog post is not sponsored, we simply love the tool and hope you will find it useful as well.
How to Create a Maze
A maze is what the Maze Mapping calls the folder structure you create which will automatically sort files and place them in the correct bins in your Project Panel.
To create your fist Maze simply select “Create Bins” create a folder and press enter to make your first bin. Make as many bins are you want. It’s also important to note that you can create multiple mazes so you can create a customize Maze for particular project types you are editing. For example, this is our main Maze structure:
01 Sequences
02 Footage
03 Audio
04 Screen Recordings
05 VFX
06 Stills
Once you create all of the bins then you must assign codecs and file types to each bin. For example, you can select “Video Codecs” (.mp4, .mov, .avi, etc) to be put into the “02 Footage” folder and you can have .wav and .mp3 files go into the “03 Audio” folder.
Once you are done assigning file types, press OK, and then from the main MazeMapping window, select “Add Selected Maze” and it will place all the bins into your Project Panel for you.
“MazeMapping is my new assistant editor. It organizes all the files so I can then start the creative part”
Import and Automatic File Sorting!
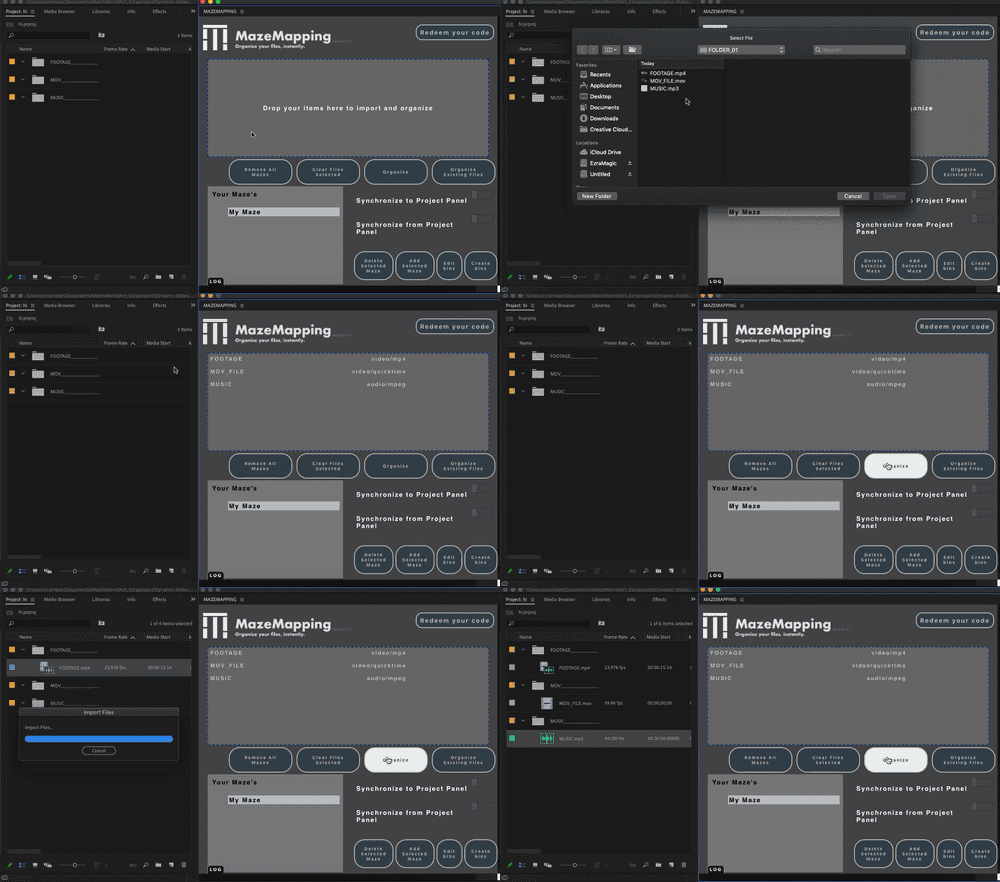
After you create your maze simply import files through the MazeMapping plugin and press organize and MazeMapping will automatically place the files in the correct folder. For example, if you told MazeMapping to put all the .mp4 files into the Footage folder it will do that for you.
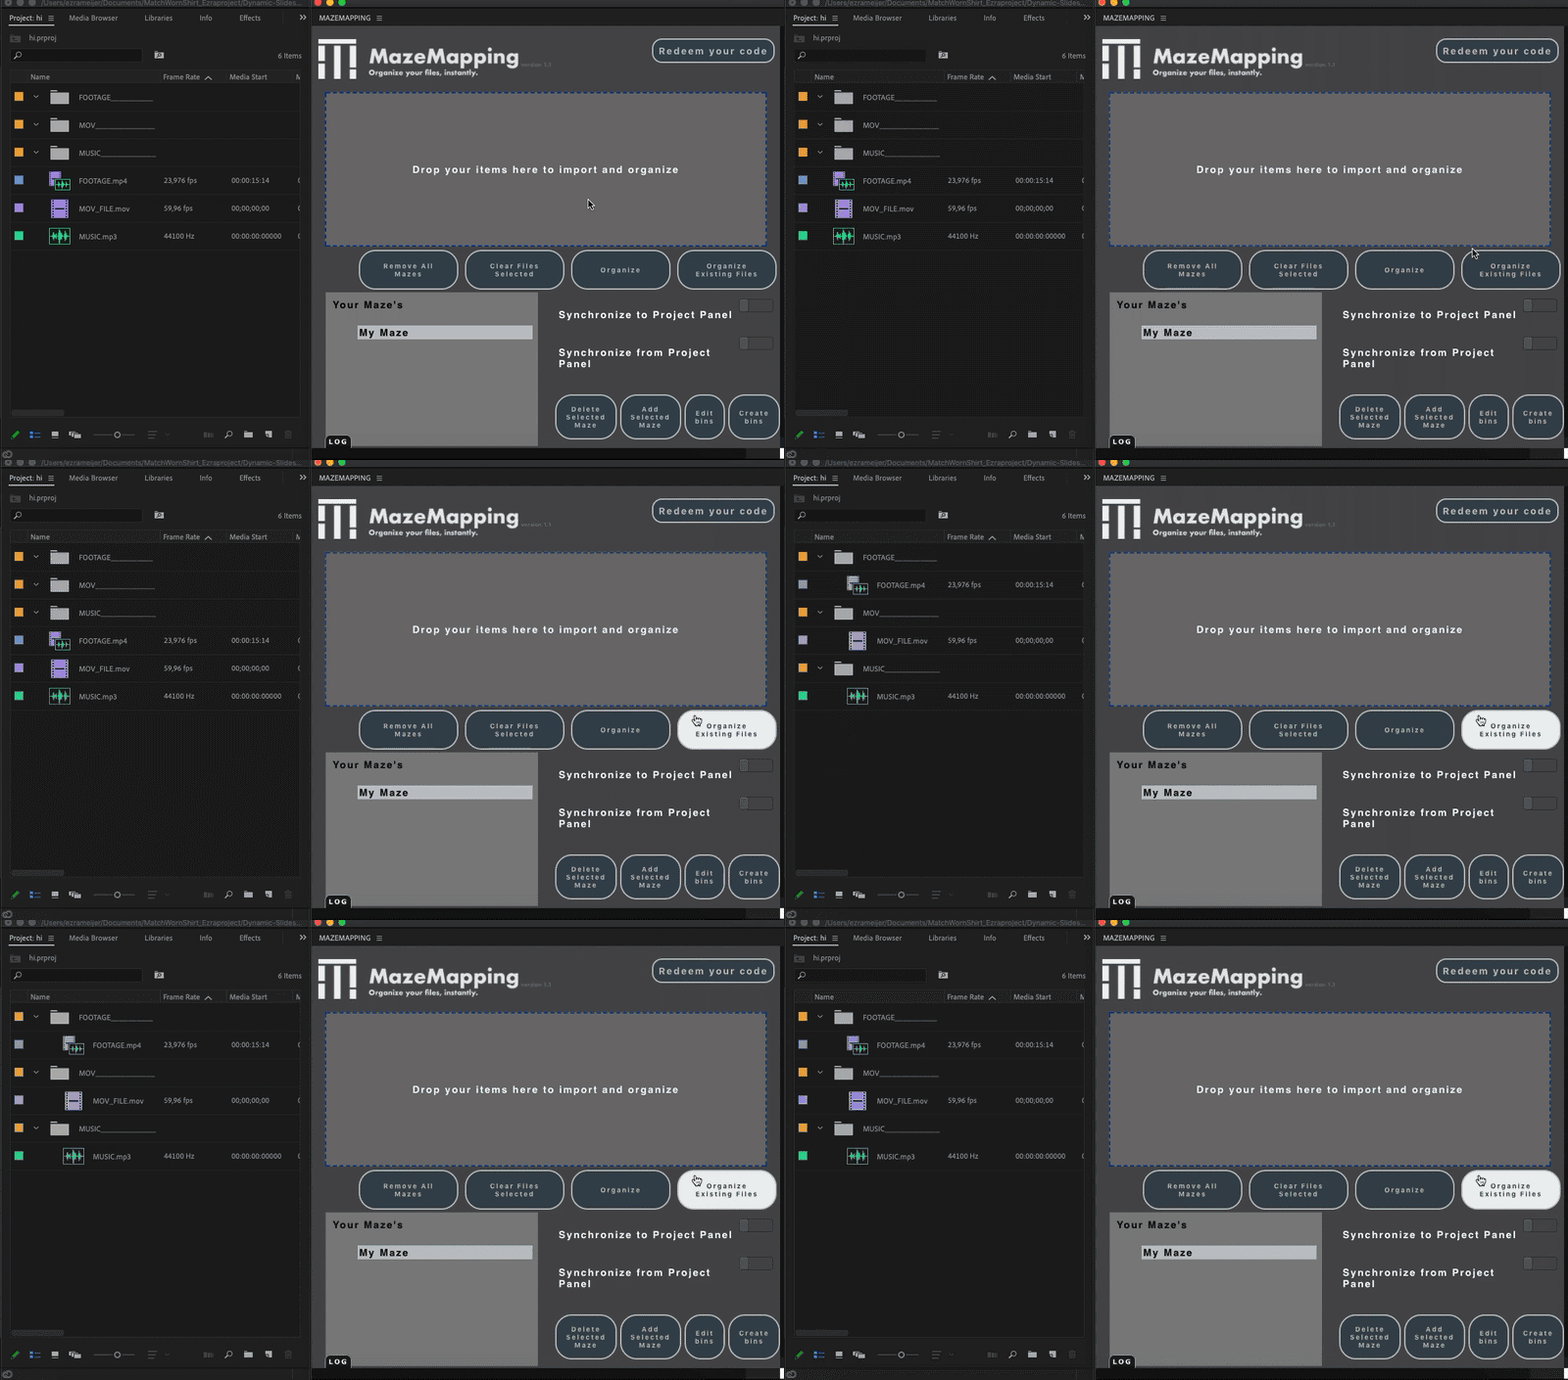
If you already have files in your project panel, simply click on “Organize Existing Files” and it will place all the files in your project panel in the correct bin for you.
Auto Sync Folders to Your Finder or Explorer
In your Maze you can all import folder from your computer so if you change the location of those files on your computer it will also update in your Project Panel as well. With this auto-syncing it will prevent your files from ever going “offline.”
Download and See it in Action
If you’d like to learn step-by-step on how to use MazeMapping from download to creation watch Ezra’s tutorial below.


