
Free Log to REC.709 Conversion LUTs for Canon, Sony, DJI, and more.
While not all LUTs (Look up Table, Color Presets) fit every time of footage, LUTs are great shortcuts to help you achieve exciting new looks fast. There are two types of LUTs: there are Creative LUTs and then there are Correction LUTs. Below we will talking about log to rec709 Correction LUTS, but if you’re looking for creative color grading LUTs I recommend this free LUT Pack for Adobe Premiere Pro and other video editors. This pack will help you achieve unique cinematic color like teal and orange, vintage, and sci-fi looks.
These free LUTs by Bounce Color will convert your milky log footage into a rec.709 color space. Below you’ll find a download link and a tutorial on how to apply the LUTs in Adobe Premiere Pro. After the conversion LUT is in place, you can then continue to apply more creative color grades to your footage. A huge thanks to Bounce Color for making these Conversion LUTS free!
LUTs Included in the Download
Here is the list of all the free LUTs included . Arri Log-C, C-log, C-Log2, Clog3, DJI D-log M, DJI D-log, F-log, N-log, V-log, RedLogFilm, S-log2, S-log3, and many more.

How to Use LUTS in Adobe Premiere Pro
To apply LUTS to your footage in Adobe Premiere Pro, you’ll need to open up the Lumetri Color Panel (Windows > Lumetri Color). From the Basic Correction section, you’ll be able to select a new “Input LUT” from the dropdown. This is where you can select “Browse…” to import one of Gal’s free log to rec.709 conversion LUTS.
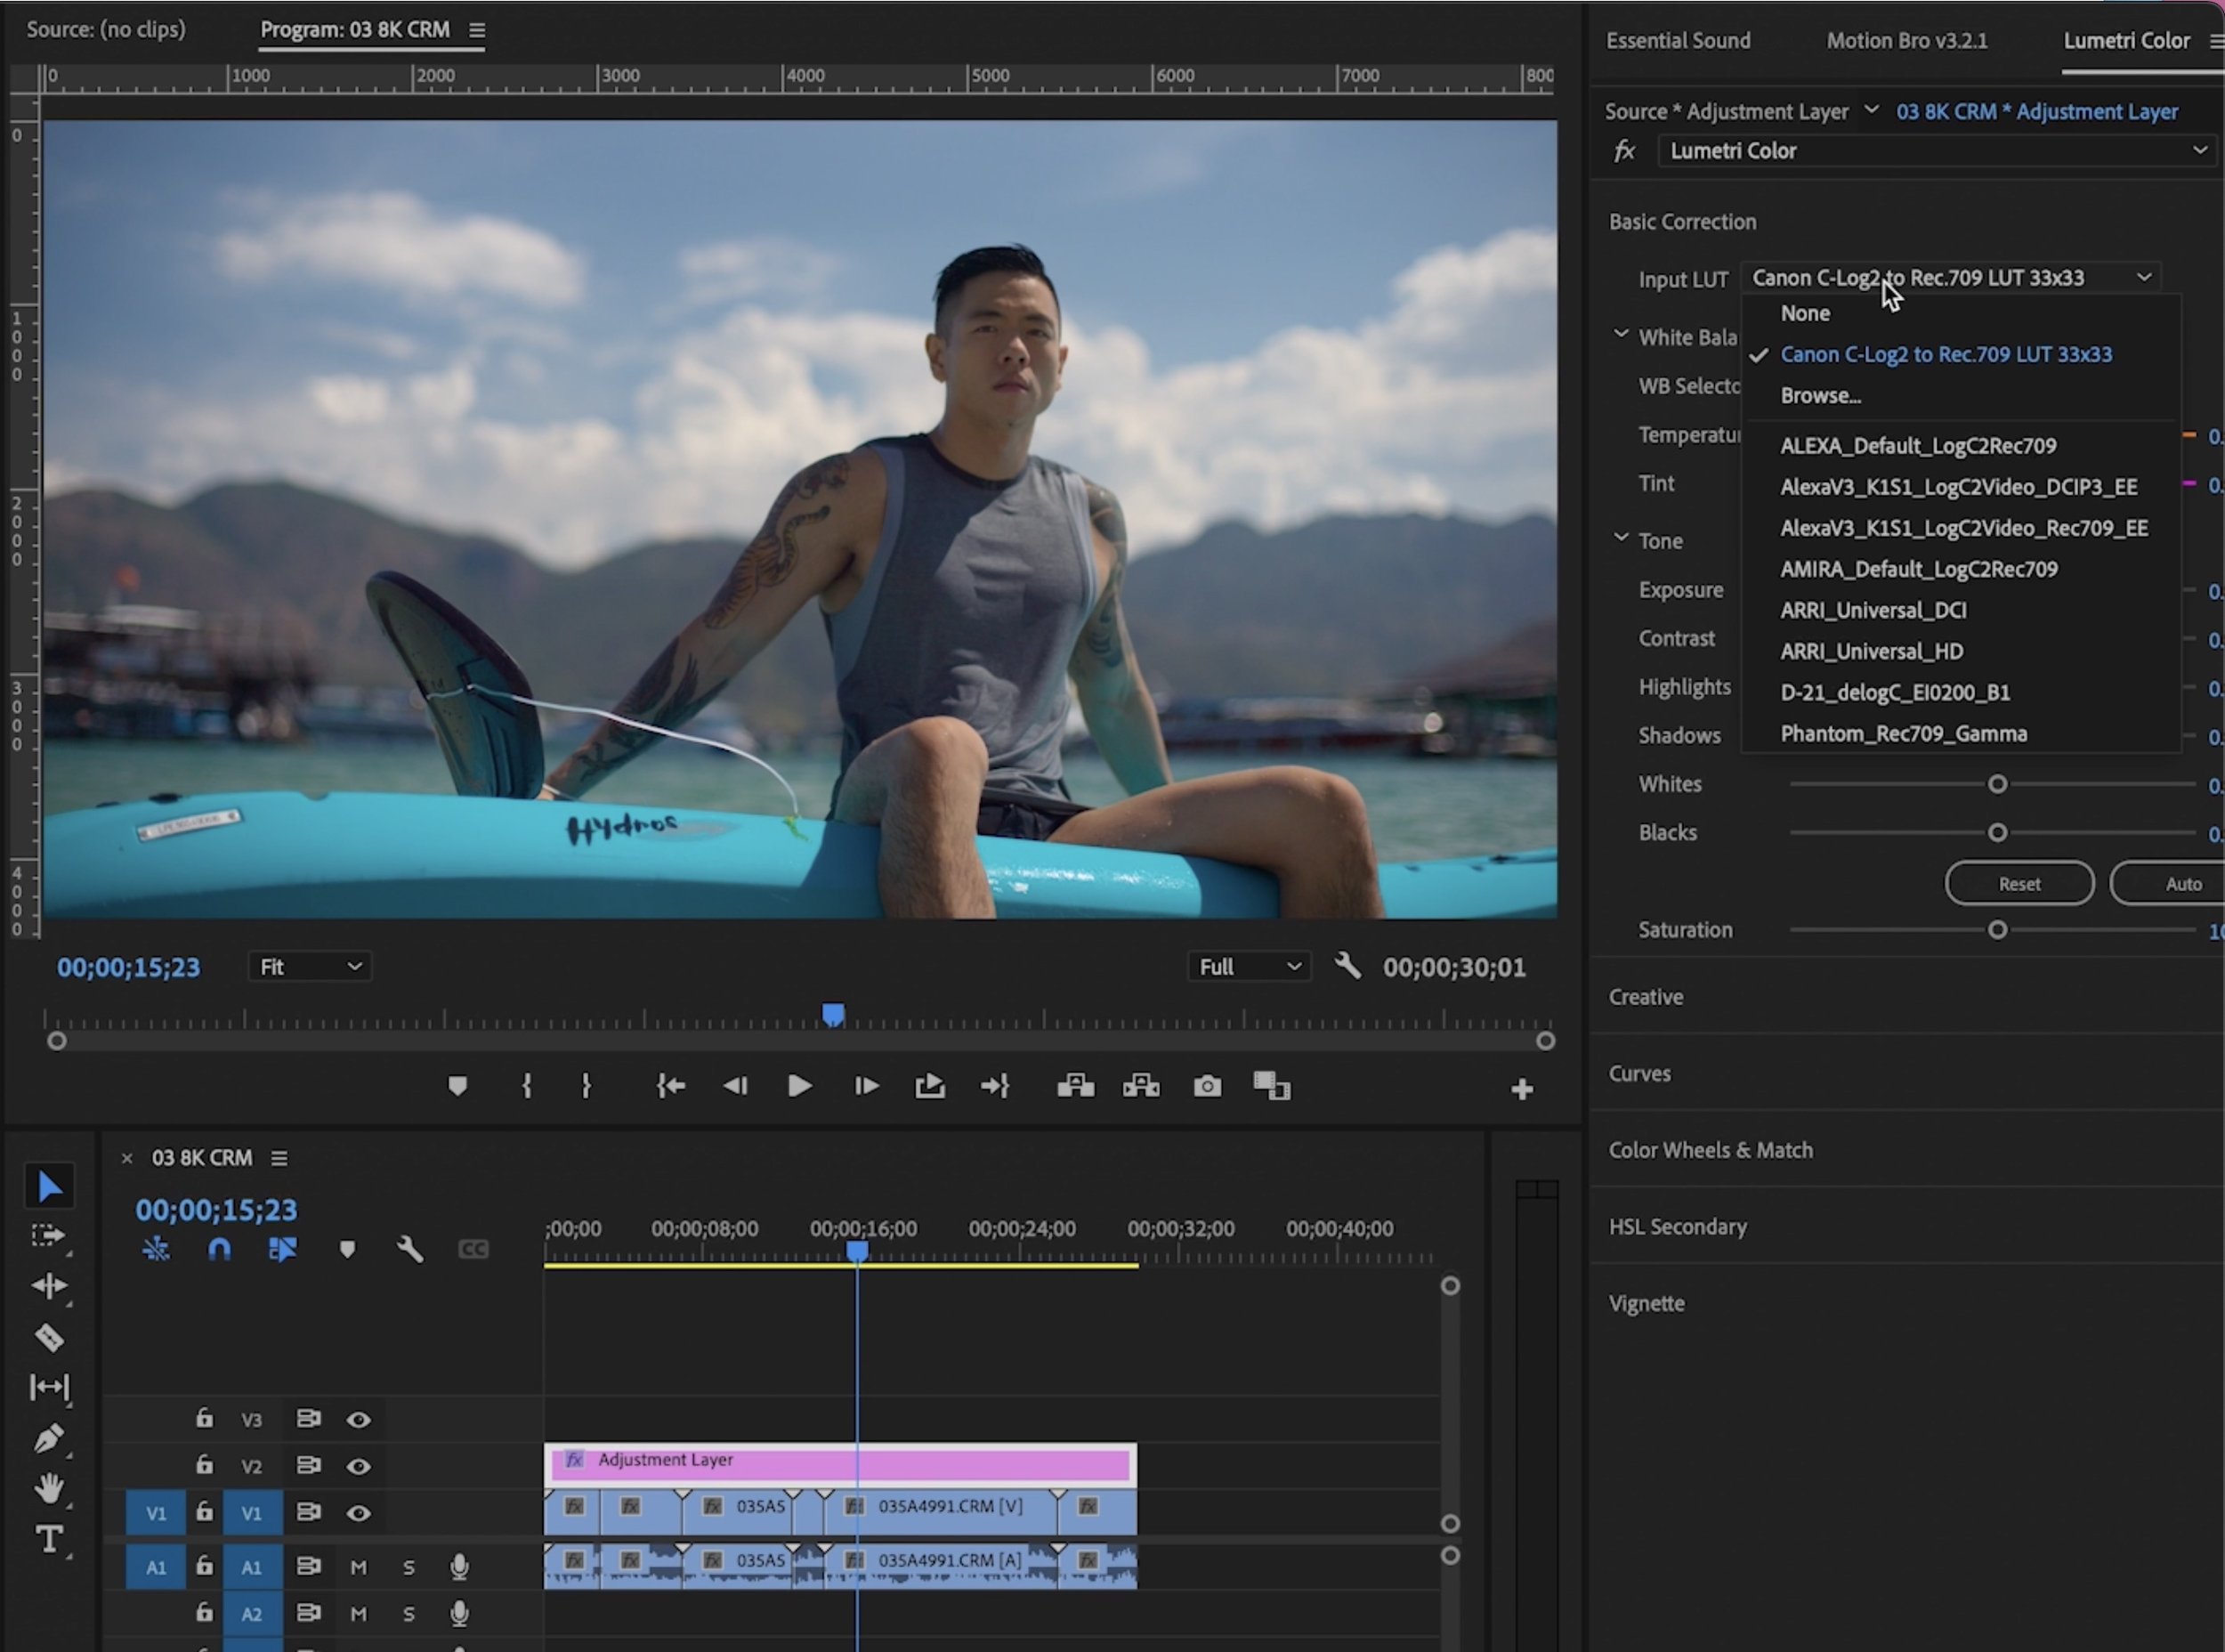
Sample 8k .CRM (c-log2) footage by Moc Filmmaker.
You’ll also notice that there is already a list of LUTS in the dropdown. To add all of the new free conversion LUTS to this dropdown (so you don’t have to browse everytime) you’ll need to create a new LUTs folder within Adobe’s Common Folder. Watch how to create a LUTs folder and add your LUTS here in this video.
Windows Users Go to C:\Users\\AppData\Roaming\Adobe\Common
Mac Users Go to /Users//Library/Application Support/Adobe/Common
Within the Common folder create a folder called “LUTs” (if you haven’t already) and within that folder make two more folders: “Technical” and “Creative.” If you want the LUTS to appear under your Basic Correction input dropdown, drag all of the LUT files into the “Technical” folder. Then restart Premiere Pro and they will appear in Lumetri color!
How to Color Grade (Full Free Course)
If you’re curious how to grade log footage from start to finish I recommend watching this free 20 minute course on color grading. You learn how to apply LUTS, create your own LUTS, as well as how to use the basic and secondary color controls with Lumetri Color and Lumetri Scopes.